
DVD-Audio Multi-CD Compilations
This article describes how to compile multiple audio CDs into a single DVD-Audio disc using
WaveLab 6 full edition.
Since a standard DVD disc
has about 7 times the storage capacity of a CD, with some images included for navigation, a standard single-sided
DVD-Audio disc could contain about 6 music CDs (CD-DA). The images used for the top level and group menus and during track
playback could be scanned images of the CD artwork and tracklists from the CD booklet/insert providing for convenient and
information-packed navigation from a DVD-Audio player connected to a video display/TV.
Ripping the audio CDs
After deciding which audio CDs will form the compilation, the CDs can be ripped to WAV files using WaveLab "Import Audio CD Tracks ..".
Use the default file format (16 bit, 44.1 kHz) since this represents the CD-DA audio format.
Since a DVD-Audio project in WaveLab consists of several montages where each montage represents a given DVD-Audio "group", it
is convenient to use the "Convert to Montage" option and also select the Freedb database function.
If the CDs are typical commercial releases, the track titles will be retrieved. However it is a good idea to verify the track titles visually in case there
are errors in the database.
Importing the track titles in this way is convenient as they will be automatically used as DVD-A track titles in the Group menus.
Assembling the Montages (Groups)
After the tracks are imported into a montage, the DVD wizard can be used to ensure correct temporal spacing of the CD/DVD tracks in the montage (the
default being 2 seconds). Next add a DVD-A picture track. Depending on what you want to display while a track is playing on the
final DVD-A, you could design a still image with the track title or further information (perhaps even the lyrics!). This process can be fairly
fast with a bit of planning and practice. Make sure that the total size of all images you add to the picture track of a given montage is less than
the 2 MB limit. In the montage properties, ensure that 16 bit format is selected and check the validity of the montage (glasses icon).
The image below shows several montages with added picture tracks. In this example, each DVD-A track contains
two images, the initial image showing the track list with an added yellow "pointer" to show the current playing track. About half way through
track playback, a second image is displayed which shows more detailed information about the track including composer, year etc.. The images could
be scanned images or images that you design from scratch using your favorite graphics editor. In the example here, the images
were scanned from the CD booklets and arranged using a simple graphics editor on a solid-color background. For NTSC format, the
image sizes used on the picture track should be 720 X 480 pixels, but to insure clear visibility on any video monitor, the usable part of the image
should be contained within a centered area of about 640 X 440 pixels. The text font should be fairly large to ensure easy visibility on any monitor:

Create the DVD-Audio Project
Next open a new DVD-Audio project and add the montages you have assembled, preferably one for each music CD. In this project, the menus
are designed with associated background graphics as mentioned above. Double click the Group names to change them. These names appear
in the top level menu which is displayed when the DVD-Audio disc is first started.
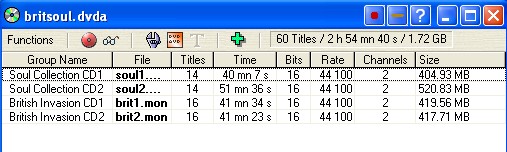
A DVD-A project layout for a 4 audio CD compilation containing a total of 60 tracks
is shown below:
Next enter the contents in the project "Main settings" dialog as shown below. Since few DVD-Audio players support DVD-Audio "static text",
it is best to disable this feature. Enter a suitable "Album name", decide if you want auto play enabled (I prefer disabling this to see the initial top level menu) and
make sure the "Generate menus" and "Include still picture tracks" options are checked:

Render the DVD-Audio Project
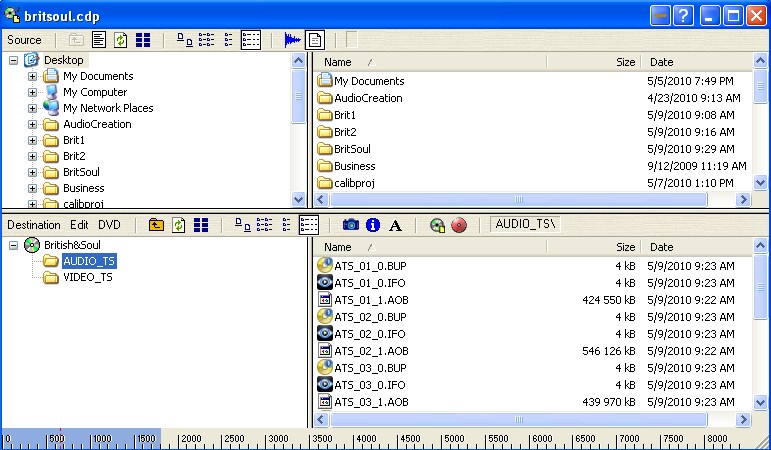
Rendering the DVD-Audio project consisting of several montages creates the various DVD-Audio files in the AUDIO_TS folder and automatically opens a
"data CD/DVD" project showing the folder layout. This rendering step creates the contents of the AUDIO_TS folder as required by the DVD-Audio specification.
The VIDEO_TS folder contains nothing but you could potentially add any video content authored separately (for example using Nero Vision).
Select a DVD name and then either select "Burn CD" or "Save to ISO Image .." if you wish to burn the image file of the DVD-Audio disc using a
different application. Note that you could potentially add an extra DATA folder before burning which might contain images, text and other information.
However this should only be done if you are sure that the target DVD-Audio player will play the disc properly:
Example: A 4 CD DVD-Audio Compilation
The images below show a DVD-Audio compilation prepared using the procedure above. The original CDs were 4 commercial albums so the project
consists of 4 montages. The CD booklet artwork was scanned, trimmed and various sections were cropped out and pasted into simple background
images to create the top level, group (track) navigation menus and pictures displayed during playback (two per track).
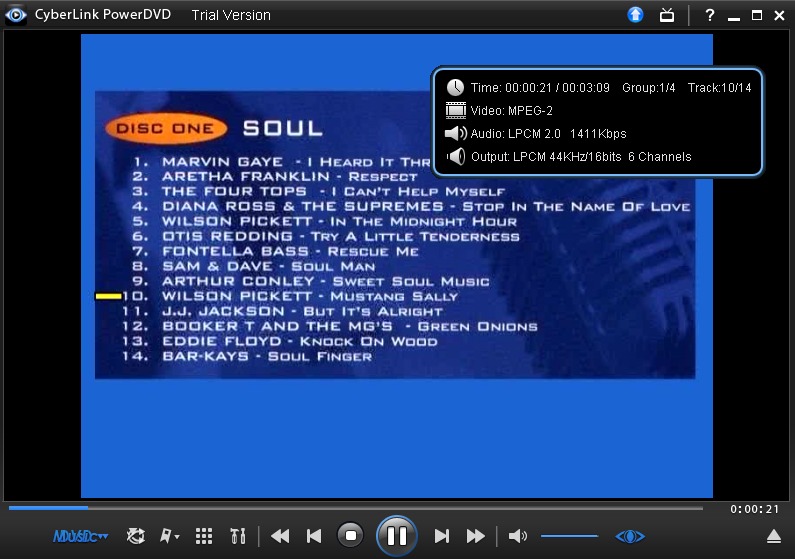
The first image below shows the top level menu as displayed with the PowerDVD 10 software player. The images below are identical to those displayed using the OPPO Digital
BDP-83 Blue-ray universal DVD player:

The next image shows the DVD-Audio track menu for the 3rd group named "British Invasion CD1". Depending on the number of tracks within the
montage, multiple pages for the tracks might be generated as in this case):

The next image shows the first image displayed at the beginning of track playback (in this case track 10 of group 1). The small yellow indicator
was added to each identical image of the track list during the graphics design phase:
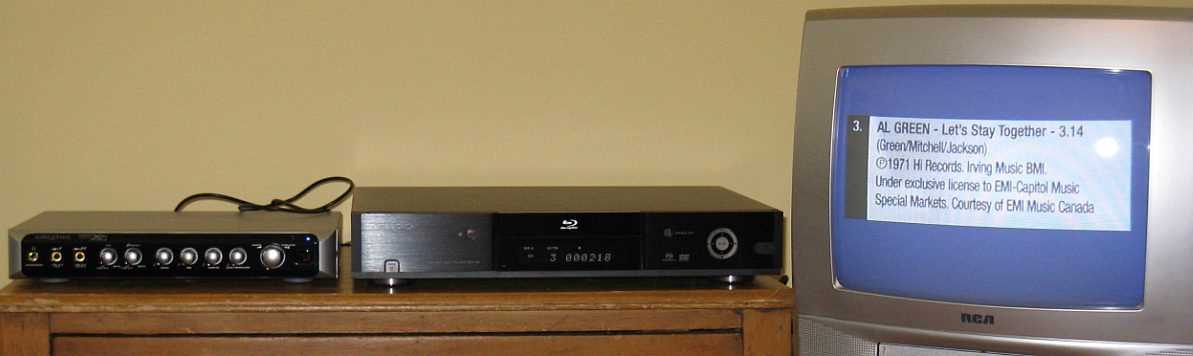
Finally, the photo below shows the OPPO Digital BDP-83 player connected via optical S/PDIF cable to a Creative Technologies X-Fi Elite Pro.
The monitor shows the second image displayed during a track playback, in this case the detailed description of the track as scanned from
the original CD insert card. The artwork was scanned at high resolution to allow for easy viewing with large lettering in the video display:
References